
Building a network
Areas
Coloured rectangles with a name, drawn behind a group of devices to say what they are. They change nothing in the network.
An area is a coloured rectangle with a short name in a corner, drawn behind a group of devices to say what they are: Core, Edge, Offices, Internet. It is there for whoever reads the drawing. The sample networks come with theirs, all but the small office.
What an area is
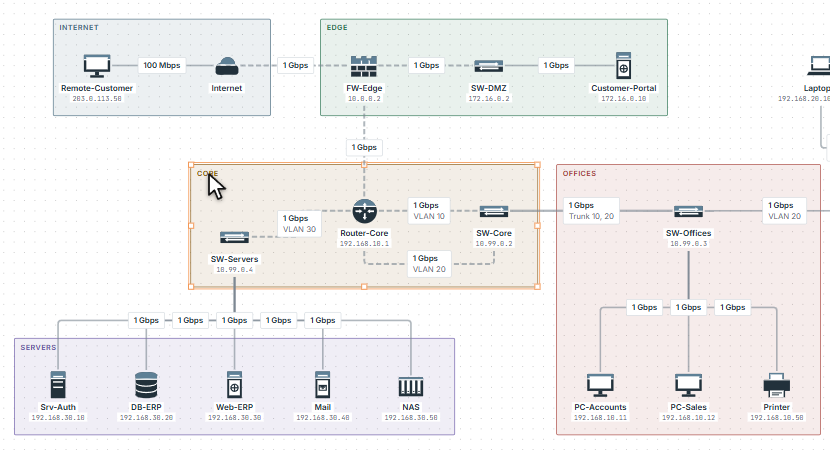
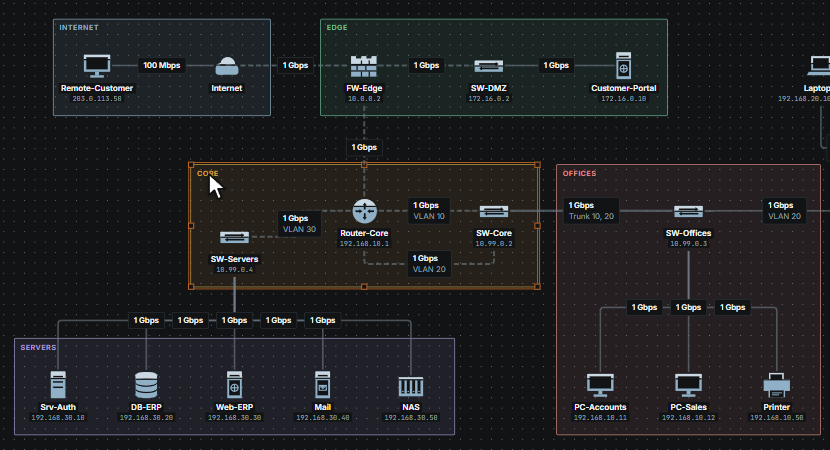
An area is a drawing and nothing else. No device belongs to it: moving an area moves no device, and moving a device does not move the area. The engine never reads it, so a PC drawn inside an area called Servers is not in any server network, and an address, a VLAN or a rule does not follow the colour. Two things look at where a device is drawn: the automatic layout, which keeps the devices of an area together and draws the area again around them, and the automatic connection, which prefers a switch of the same area.
An area is light, so that it is not in the way: devices and cables are drawn over it, a selection box drawn on it takes the devices and leaves the area unless it holds the whole of it, and selecting, copying, pasting and deleting devices work as they do without it.
Adding one
There are two ways:
- In the bar on the left press “Add device”, and in the panel “Add” choose “Area”. An area is added at the centre of the part of the board you are looking at.
- Select the devices it is for, and choose Edit → “Enclose in an area”, or right click one of them and choose “Enclose in an area”. The area is drawn around the selected devices, with room for its name. Where that room would cross another area, or cover a device that is not in the selection, it gives way, down to a small margin; an area made inside another stays inside it.
Either way the new area is selected and its name is open for typing. Type the name and press Enter. A name is up to 40 characters, with extra spaces taken out. An area with no name is shown as “Unnamed”. The area gets a colour of its own: of the six, the one used the least on the board so far.
Moving, resizing, renaming
- Select an area with a click on its name or on its border. The inside does not take the press, so that the devices in it can be reached.
- Move it by dragging its name or its border. The devices stay where they are, unless they are selected with it.
- Resize it with the eight handles it shows when it is selected by itself. It cannot be made smaller than 120 by 80.
- Rename it with a double click on its name, or right click → “Rename”. “Area name” is the field in which you type; Enter keeps the name, Esc leaves it as it was.
- Colour: right click → “Colour”, and pick one of six: Slate, Green, Ochre, Red, Purple, Teal.
- Delete: the Delete key or right click → “Delete”, both after a question. The devices it encloses stay where they are.
With the devices
An area can be part of the selection, together with devices and other areas:
- a selection box takes the areas it holds whole, with the devices;
- Ctrl + click on the name or the border of an area adds it to the selection, or takes it away; the devices stay selected;
- a click on a device, without Ctrl, starts a new selection, and the areas are let go.
What is selected goes together. Dragging a selected device, or the name of a selected area, moves the whole selection. Edit → “Copy” and Ctrl + C copy the selected areas with the devices; pasted, each is in the same place around its devices, with its name and colour, as a new area. The Delete key deletes them with the rest, after a question that says how many of each. An area can also be copied and pasted alone.
On the board and in the file
Areas belong to their board: they stay with it when you go to another board of the project and back, and they are saved in the project file. The YAML export carries them, with the place of each device. A presentation shows the areas and lets nothing be done to them; the small map shows the devices alone, and the exported image draws the areas, in light and in dark.
Showing and hiding them
View → “Show areas” hides the areas and shows them again. It is marked when on, which it is at first. The choice is a preference of this browser, kept with the theme: the drawing and the project file are not touched. Hidden, the areas are not drawn on the board, in a presentation or in the exported image; they cannot be selected, moved or resized, and the Delete key does not reach them. Making a new area shows them again, and a notice says so.
Limits
Limits
- An area is not a network, a site or a VLAN: it has no address and no settings, and the engine does not read it.
- One area may be drawn inside another, and the automatic layout keeps it there; that is all it means.